At Plunge Pools Perth, we help local homeowners understand and manage this entire process every day. Our work focuses on guiding people through approvals, site checks, engineering requirements, installation planning, and final certification — all within Perth and Western Australia rules. We don’t just install plunge pools; we help homeowners avoid the common mistakes that cause delays, compliance issues, or long-term structural problems.
In this article, you’ll learn exactly what to check before installing a plunge pool at home. We’ll explain each step in simple terms, show why it matters, and outline how the right decisions at the start can prevent stress, extra costs, and problems later on.
Are You Legally Allowed to Install a Plunge Pool in Perth?
Yes, most plunge pools in Perth require approval, even small ones.
In Western Australia, plunge pools are regulated under building and planning laws, and approval is usually required before installation. Whether you need approval depends on the pool type, size, location, and safety requirements, not just whether it’s “small” or marketed as portable.
What approval depends on
- Pool type: in-ground, above-ground, semi-recessed, precast, fibreglass
- Depth and volume
- Distance from boundaries and buildings
- Fencing/safety barriers
- Local council planning rules
How to confirm (do this before you order)
- Call your local council.
- Speak to a private building surveyor/certifier.
- Check WA building and pool safety rules.
If you skip approval
- Stop-work notices
- Costly changes or relocation
- Insurance and sale problems
- In some cases, the removal of the pool
What Are the Pool Fencing, Safety Barrier, and Legal Use Requirements?
In Perth, you cannot fill or use a pool until compliant fencing and safety barriers are installed. Pool fences must be at least 1.2 m high, gates must self-close and self-latch, latch access must be child-safe, and a 900 mm non-climbable zone must be kept clear before any water goes in.
Fast facts (Perth, WA)
| Rule | What it means |
| Fence height | Usually min 1.2 m |
| Gate | Self-closing and self-latching |
| Latch | Out of reach of kids |
| NCZ | 900 mm non-climbable zone outside the fence kept clear |
| Timing | Fencing must be in before water goes in |
NCZ (non-climbable zone) — common fails
- Chairs/benches, pot plants, BBQs, storage boxes
- Raised garden beds, retaining walls, deck edges/steps
Inspections check
- Fence and gate operation
- Latch height and access
- Clearances and climb points
- Temporary fencing during build (if used)
What Pool Type Is Right for Your Site in Perth?
The right pool type depends on your soil conditions, site access, and how you plan to use the pool, not just how it looks.
Choosing a plunge pool without matching it to your site is one of the most common (and costly) mistakes homeowners make in Perth. Soil type, access constraints, and intended use all affect structural performance, compliance, installation cost, and long-term durability.
| Type | Best for | Pros | Watch-outs |
| Fibreglass | Stable, sandy sites | Light, smooth, faster install | Needs a correct base & drainage |
| Precast concrete | Reactive or mixed soils | Strong, rigid, durable | Heavier, needs crane planning & engineered base |
Tip: Do soil testing before picking the pool type.
Why Is Soil Testing and Engineering Required Before Installing a Pool?
Soil testing and engineering are required before installing a pool because they show how to build a stable base that won’t move, crack, or cause structural damage over time.
A soil report identifies soil type, load capacity, moisture behaviour, drainage conditions, and the depth of stable ground so the pool can be engineered correctly for the site.
The soil report covers
- Soil type (sand, clay, fill, mixed)
- Strength/load capacity
- Moisture behaviour & drainage
- Depth of stable ground
Why it matters
- Even load spread
- Movement control on clay sites
- Less stress on the shell and plumbing
What Pool Setback and Boundary Rules Apply in WA?
In Western Australia, a pool must meet minimum setback and boundary clearances set by local councils and the Building Code of Australia.
Even a well-built pool can fail approval if it is too close to boundaries, buildings, retaining walls, or easements.
What to check
- Side/rear boundaries
- House and outbuildings
- Retaining walls
- Easements and drainage lines
Narrow blocks — common solutions
- Run the pool parallel to a boundary
- Keep one clear service/access side
- Integrate fencing with boundary walls (if allowed)
When to hire a building surveyor
- Tight/odd-shaped sites
- Close to structures or retaining walls
- Easements in the yard
- You need measured, signed-off distances
Avoid costly relocations
- Confirm setbacks before the final pool size
- Check fencing zones at the same time
- Leave room for drainage and backfill
- Align placement with engineering plans
Why Must You Check Underground Services Before Digging a Pool?
You must check underground services before digging a pool to avoid hitting gas, water, sewer, power, or communication lines, which can cause serious safety risks, structural problems, legal issues, and costly delays.
Always obtain a Before You Dig report and physically confirm services on site before excavation begins.
What a “Before You Dig” Report Shows
A Before You Dig report provides critical information about underground infrastructure on or near your property, including:
- Likely paths of underground services such as gas, water, sewer, electricity, and telecommunications
- Asset owners and contact details responsible for each service
- Indicative service depths and corridors (not exact locations)
This report is a legal and practical starting point, but it is not enough on its own. Services often deviate from plans, especially on older properties or renovated sites.
If services cross your pool area
- Pause excavation
- Shift the pool location (fastest) or
- Seek approvals for protection/relocation (costly)
Why it matters
- Safety, soil stability, drainage paths, base design
How Deep Should You Excavate for a Pool and What Clearances Are Required?
Follow the engineer’s levels exactly; even a few millimetres off can cause major structural and drainage issues.
Pool excavation depth is not just the shell depth. It must allow for the engineered base, drainage layers, and finished surface levels around the pool, plus safe working clearances.
What Determines the Correct Excavation Depth?
The final excavation depth is calculated from the engineer’s drawings, not guesswork or the pool brochure. Several layers and allowances must be included.
1. Pool Shell Height
This is the physical height of the fibreglass or precast concrete shell from base to waterline. It forms only part of the total dig depth.
2. Engineered Base Thickness
Below the shell sits a structural base, which may include:
- Compacted road base or crushed limestone
- Stabilised sand or gravel
- Concrete or reinforced slab (on reactive or poor soils)
The base thickness is designed to:
- Spread loads evenly
- Prevent settlement
- Control movement on clay or filled sites
Skipping or thinning this layer is one of the most common causes of pool shell cracking.
3. Drainage Layers
Perth soils vary from free-draining sand to reactive clay. Engineers often require:
- Drainage gravel
- Agricultural pipes (aggies)
- Soak wells or connect to approved drainage
These layers must sit below or around the base, increasing excavation depth.
4. Finished Surface Levels
Excavation must allow for:
- Paving or decking thickness
- Coping and pool surrounds
- Finished ground levels that slope water away from the pool
If finished levels aren’t considered early, the pool can end up too low, causing flooding or non-compliant fencing heights.
What Happens If You Excavate Too Deep?
Digging too deep is not a small mistake — it usually means rebuilding work, not “packing it up a bit”.
Common Consequences
- Rebuilding the base to engineered specifications
- Extra fill, concrete, or stabilised material
- Compaction testing and re-certification
- Inspection delays and rescheduling trades
- Added costs that are not recoverable
In many Perth pool projects, over-excavation costs more to fix than under-excavation.
Excavation on Sloped or Difficult Sites
Sloped blocks require extra planning and deeper consideration.
Additional Factors on Sloped Sites
- Cut-and-fill excavation methods
- Retaining walls (temporary or permanent)
- Stronger drainage control to manage runoff
- Deeper footings or reinforced bases
Poor excavation on a slope can lead to:
- Pool movement downhill
- Drainage failure
- Retaining wall pressure issues
This is why engineering and excavation must be coordinated, not done independently.
How Much Clearance Is Required Around the Pool?
Excavation is wider than the pool shell itself. Clearance space is critical for correct installation and long-term performance.
Typical Clearance Allowances
Clear space is required around the pool for:
- Plumbing connections and pipework
- Even backfilling and compaction
- Drainage material placement
- Inspections and certifications
While exact clearances vary by pool type and engineer, insufficient space often causes:
- Poor backfill compaction
- Plumbing stress and leaks
- Trapped water against the shell
- Failed inspections
Clearances are not optional — they are part of the engineered design.
What Pool Base Design Is Right for Your Site: Gravel, Concrete, or Engineered?
Match the pool base to your soil type and pool weight. The right pool base design depends on ground conditions, drainage, and load requirements. Sandy sites may suit compacted gravel, reactive soils often need a concrete slab, and complex or heavy installations require an engineered base system.
| Base | Best for | Notes |
| Compacted gravel | Stable sandy soils | Drains well but needs tight compaction |
| Concrete slab | Reactive/mixed soils | Even support, plan drainage so water can’t sit |
| Engineered system | Complex/heavy installs | Custom mix of slab, gravel, footings, and drains |
Why Is Drainage Planning Critical for Pool Installation?
Drainage planning is critical for pool installation because water must be directed away from the pool shell, your house, and neighbouring properties to prevent structural damage, uplift pressure, and long-term failure.
Good drainage needs
- Correct fall/gradient (continuous)
- Subsoil drains where needed
- Legal discharge (soakwells/stormwater, where allowed)
High water table suburbs
- Deeper drainage layers
- Clear discharge paths
- Watch the uplift pressure
Warranties
- Many need proof of working drainage built to the plan
Why Must Crane and Delivery Be Planned Early?
Crane and delivery planning must be done early because wind, access issues, or incorrect crane sizing can stop the lift on the day and cost thousands in delays.
A plunge pool shell can’t be “half lifted” or easily rescheduled without extra fees, permits, and coordination. Early planning reduces risk, cost blowouts, and last-minute cancellations.
Lift plan basics
- Crane size vs pool weight
- Reach from the setup point to the pool hole
- Clear swing over fences/roofs/trees
- Stable ground for outriggers
- Truck access for delivery
Wind & weather
- High wind = lift delayed
- Insurance may not cover unsafe lifts
- Have a backup date
The Real Cost of Poor Crane Planning
Failing to plan crane and delivery logistics early can result in:
- Cancelled lifts and rebooking fees
- Idle trades and extended timelines
- Additional crane hire at higher rates
- Damage to fences, roofs, or neighbouring property
- Delayed inspections and certification
In contrast, early crane planning keeps the installation smooth, compliant, and predictable.
Why Must a Pool Shell Be Levelled Precisely Before Backfilling?
Levelling the pool shell is one of the most critical stages of pool installation. This step happens before backfilling, when adjustments are still possible. Once backfill material is added and compacted, the shell becomes locked in place.
Why level matters
- Even waterline
- Even load on the base
- Less stress on the shell and plumbing
Tolerances
- Tiny variations may pass
- Bigger ones must be fixed before backfill
What Is the Correct Way to Backfill a Pool?
The correct way to backfill a pool is to use the balanced pressure method — filling the pool with water while adding backfill at the same height around the shell.
This keeps pressure equal inside and outside the pool, preventing shell movement, cracking, or plumbing damage.
How the Balanced Pressure Method Works (Step by Step)
Correct pool backfilling is not about speed — it’s about control, balance, and consistency.
1. Add Water in Stages
Begin filling the pool with clean water as soon as the shell is placed and levelled. Water adds internal weight that stabilises the pool shell during backfilling.
2. Add Backfill to the Same Height
As the water level rises, add backfill material around the outside of the pool to the same height as the water inside.
This equalises pressure and prevents the shell from bowing, lifting, or twisting.
3. Compact Each Layer
Backfill must be placed in layers, not dumped in all at once.
Each layer should be compacted evenly to reduce settlement and future movement.
4. Re-Check Pool Level Continuously
Use a laser level or spirit level throughout the process.
If the pool moves even slightly, it must be corrected before continuing.
Why Balanced Backfilling Is Critical
Incorrect backfilling is one of the most common causes of long-term pool problems.
Avoid Voids
Voids are empty pockets left behind by poorly placed backfill.
Why voids are dangerous:
- They hold water
- They allow soil movement
- They increase hydrostatic pressure
- They cause an uneven load on the shell
Over time, voids can lead to:
- Pool shell distortion
- Cracked plumbing lines
- Uneven waterlines
- Structural stress that voids warranties
Choosing the Right Backfill Material
Not all soil is suitable for pool backfilling.
Recommended Backfill Characteristics
The best backfill for pool installation is:
- Free-draining (allows water to escape)
- Non-reactive (won’t swell or shrink)
- Evenly compactable
- Low in clay content
Commonly approved materials include:
- Crushed limestone
- Washed sand (where engineering allows)
- Engineered gravel blends
Clay-rich soils, excavation spoil, or organic fill should never be used unless approved by an engineer.
Why Must Pool Plumbing Be Done by a Licensed Plumber and Pressure-Tested?
This ensures the plumbing is legally compliant, leak-free, and protected before pipes are buried and access is lost.
Why Pool Plumbing Must Be Done by a Licensed Plumber (WA)
Legal compliance
In WA, pool plumbing falls under regulated plumbing work.
A licensed plumber:
- Works to the Plumbing Code of Australia (PCA) and WA regulations
- Can issue compliance documentation if required
- Ensures council and certifier approvals are not jeopardised
Unlicensed plumbing can:
- Fail inspections
- Void warranties
- Create insurance issues at claim time
Correct pipe sizing and layout
Licensed pool plumbers understand:
- Correct pipe diameters for circulation efficiency
- Proper suction and return balancing
- Equipment placement to minimise head loss and noise
Poor plumbing design leads to weak flow, noisy systems, and premature pump or filter failure.
Why Pressure Testing Pool Plumbing Is Critical
Finds leaks early (before it’s too late)
Pressure testing:
- Detects cracked pipes, loose joints, or faulty fittings
- Confirms solvent welds and connections are sealed
- Identifies damage caused during installation
Once pipes are buried, even a small leak can go unnoticed for months.
Prevents costly dig-ups later
Leaks after backfill can cause:
- Soil erosion around the pool shell
- Undermining of the pool base
- Wet sand zones that destabilise the structure
Fixing these issues often means removing paving, decking, or even partial backfill — costing thousands.
Protects the pool shell and structure
Undetected leaks increase moisture around the pool, which:
- Increases hydrostatic pressure
- Raises the risk of movement or shell stress
- Can damage surrounding retaining walls or foundations
Why Is Licensed Electrical Work Required for Pools?
All pool electrical work must be carried out by a licensed electrician to meet safety laws, pass inspections, and protect people from electric shock.
Safety systems
- RCDs (safety switches)
- Correct earthing/bonding
- Isolation switches
Hardwired vs plug-in
- Depends on load and equipment type
- The electrician will choose the compliant option
Non-compliant work
- Failed inspection
- Voided warranties or insurance
Equipment placement
- Dry, ventilated, service access, safe distances
Why This Matters for Pool Owners in Perth
Perth councils and private building surveyors closely check pool electrical compliance before issuing final approval. Without a licensed electrical sign-off, you are not legally allowed to use the pool.
Using a licensed electrician protects:
- Your family’s safety
- Your pool approval timeline
- Your insurance and warranties
- The long-term reliability of your pool system
What Happens During the First Fill, Commissioning, and Water Balancing of a Pool?
During first fill and commissioning, the pool is filled gradually, circulation is started, and water chemistry is adjusted to the correct levels before swimming. This prevents surface damage, protects pumps and heaters, and ensures warranties remain valid.
Commissioning checklist
- Set pH and alkalinity
- Add sanitiser to spec
- Start and check circulation
- Record readings (keep for warranty)
Cold vs heated start-up
- Cold: start mild, cool down slowly
- Heated: warm slowly, watch the flow and temperature
When can you swim?
- Usually, 24–48 hours after water is balanced and systems are running right
When Is a Pool Legal to Use in WA?
A pool in Western Australia is only legal to use once it has passed final inspection and a compliance or occupation certificate has been issued.
Until this certification is complete, the pool must not be used, even if it looks finished.
Inspectors check
- Fencing and NCZ
- Pool placement & setbacks
- Electrical safety
- That the build matches the approved plans
After approval, you get
- Compliance/occupation certificate
- Updated council/building records
- Proof for insurers and future buyers
If not certified
- Insurance risk and legal issues
DIY vs Professional Pool Installation: Which Is Better?
While DIY pool kits appear cheaper upfront, they often cost more in the long run due to approval delays, failed inspections, rework, and voided warranties. A professional installer manages approvals, engineering, licensed trades, and final certification, getting your pool legal, safe, and usable faster.
| Option | Pros | Risks |
| DIY kit | Lower upfront cost | More delays, failed inspections, limited/void warranties |
| Professional (turnkey) | Approvals & sequencing managed, clear responsibility | Higher upfront cost, faster to certification |
When pros are required
- Licensed plumbing/electrical
- Engineered base/sign-off
- Final certification
Conclusion
Installing a plunge pool at home in Perth is not a single decision. It is a chain of decisions, each linked to the next. When the chain is strong, the project flows smoothly. When one link is weak, stress and cost follow.
Proper planning prevents long-term cost blowouts. It protects warranties, simplifies approvals, and ensures the pool can be used legally and safely. From soil testing and drainage to fencing and final certification, each step exists for a reason.
If you want guidance through this process, Plunge Pools Perth is here to help. We work with Perth homeowners to plan, coordinate, and install plunge pools the right way — with compliance, clarity, and care at every step. A simple conversation early can prevent months of stress later.
When you’re ready, reach out to Plunge Pools Perth to discuss your site and your options.
FAQs
1. Do I actually need council or building approval for a plunge pool on my property in Perth?
Yes, most plunge pools in Perth require building approval, and some also require planning approval. Approval depends on pool type, depth, fencing, and setbacks. Even small plunge pools are regulated under WA building and safety laws.
2. What are the most common reasons plunge pool installations fail inspection in Perth?
Most plunge pools fail inspection due to non-compliant fencing, breaches of the 900mm non-climbable zone, incorrect setbacks, or missing certification. These failures usually come from poor planning, not poor construction.
3. Is my soil and backyard suitable for a plunge pool, or will engineering make it expensive?
Most Perth backyards can support a plunge pool, but soil type determines the base design. Sandy soil is usually simpler, while reactive clay needs engineering. Skipping soil testing increases cost risk later, not upfront savings.
4. Is DIY plunge pool installation really cheaper once approvals, engineering, and compliance are included?
No, DIY plunge pool installation is rarely cheaper once approvals, engineering, licensed trades, and compliance fixes are included. Most cost overruns come from failed inspections, rework, and lost warranties rather than the pool itself.
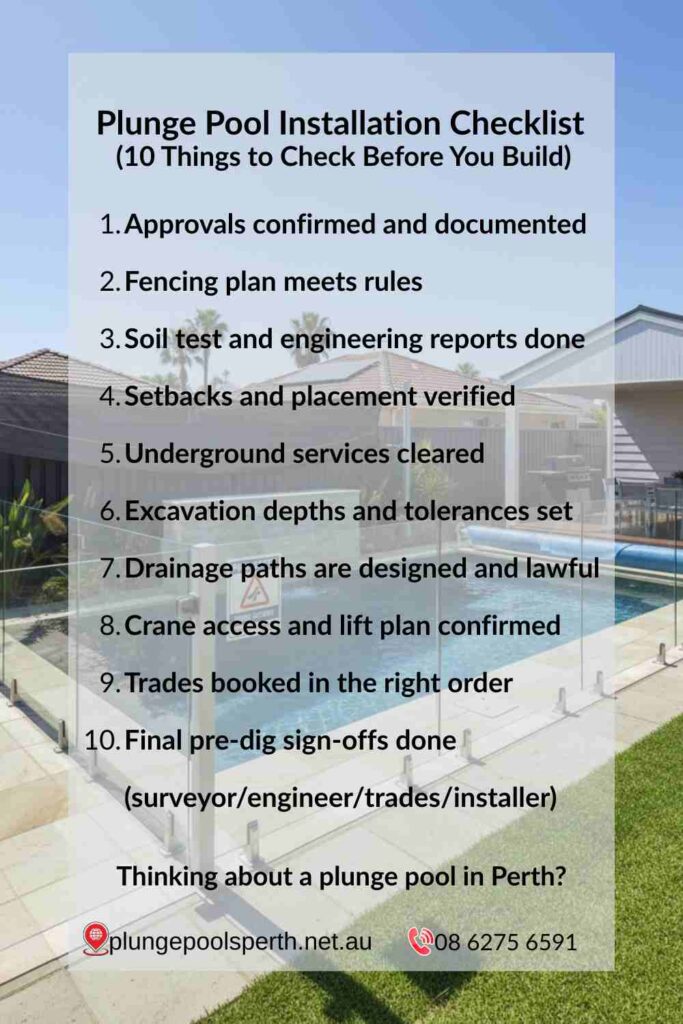
5. What should I check or confirm before I order a plunge pool or book excavation?
Before ordering a plunge pool, confirm approvals, fencing requirements, soil test results, setbacks, drainage design, and crane access. Once a pool is ordered or excavation begins, fixing mistakes becomes costly and often unavoidable.